Setting up email clients
In addition to using the Yandex.Mail web interface, you can also work with your messages using various email clients. To do so, you need to enable POP3 or IMAP protocol in your mailbox settings. Follow these steps:
- Open the Settings menu:
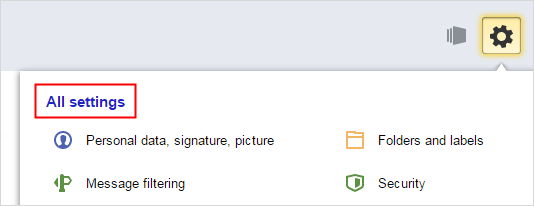
- Select Email clients.
- Select the required protocol.
- Save the changes.
Configuring IMAP protocol
When using the IMAP protocol, the email client syncs with the server and saves the structure of folders in your mailbox. Messages that you send from the email client will be saved both on your computer and on the server, and you can access them from various devices.
To set up an email client for the IMAP protocol, you need to specify the following:
- Incoming mail
-
- mail server address — imap.yandex.com
- connection security — SSL;
- port — 993.
- Outgoing mail
-
- mail server address — smtp.yandex.com;
- connection security — SSL;
- port — 465.
For access to the mail server, provide your Yandex username and password (or the application password if you enabled two-factor authentication). If you are configuring email delivery from a mailbox such as “[email protected]”, your username is the first part of the address before the “@” sign.
IMAP support will be enabled automatically the first time you log in to the mail program.
Configure POP3 protocol
When using the POP3 protocol, all messages from the folders that you select in the menuSettings → Email clientsmenu will be saved by the mail client on your computer in the Inbox. If necessary, you can set up filters in the email client to automatically move messages to the desired folders. Messages you send will only be saved on your computer.
To set up a mail client for the POP3 protocol, you must specify the following:
- Incoming mail
-
- mail server address — pop.yandex.com;
- connection security — SSL;
- port — 995.
- Outgoing mail
-
- mail server address — smtp.yandex.com;
- connection security — SSL;
- port — 465.
For access to the mail server, provide your Yandex username and password (or the application password if you enabled two-factor authentication). If you are configuring email delivery from a mailbox such as “[email protected]”, your username is the first part of the address before the “@” sign.
You can set up message delivery over POP3 from any folder, including Spam. To do this, open menu Settings →Email clients and select the needed folders.
By default, when downloading folder contents using email clients, messages are not marked as read. If you want to mark the received messages as read, enable the corresponding option.
Microsoft Outlook
Microsoft Outlook
To receive mail via Microsoft Outlook, you must first enable POP3 or IMAP support in your mailbox settings.
Configuring IMAP protocol
- Launch the program and click Next in the welcome screen.
- In the Configure your account window, leave Yes as the default value and click Next.If you already have an Outlook account and want to add another, choose File → Details and click Add a new account.
- Select Manually configure the server parameters or additional server types and click Next.
- Leave the default value for Internet email and click Next.
- Specify the following account parameters:
- Name — user name (for example, “James Kirk”);
- Email address — your Yandex Email address (for example, “[email protected]”);
- Type of account — IMAP;
- Incoming mail server — imap.yandex.com;
- Outgoing mail server (SMTP) — smtp.yandex.com;
- User — your Yandex username;
- Password – your Yandex password (or the application password if you enabled two-factor authentication).
Attention! If you are configuring the mail delivery from a mailbox like “[email protected]”, then specify only the first part of the address (before the @ sign) in the “User” field.Leave default values for all other parameters and click Other settings.
- Open the Outgoing mail server tab, enable the SMTP requires authentication checkbox, and select Same as the incoming mail server.
- Go to the Advanced tab and specify the following parameters :
- IMAP server — 993;
- SMTP server — 465.
For the Use the following type of encrypted connection option, select SSL for the IMAP and SMTP servers.
Click OK.
- To finish account configuration, in the Add a new account window, click Next to validate the account settings you have specified. If all the settings are correct and confirmed, click Ready. If not, make sure that all the parameters are entered properly.
- Synchronize the newly created account with the server to obtain a list of folders.
- In the menu, open File → Account Settings (Microsoft Outlook 2010 and later) or Tools → Account Settings (Microsoft Outlook 2007 and earlier), then select the account on the Email tab and click the Editbutton.
- Click Other settings and go to the Sent tab.
- Set the field Save the sent items in the following folder on the server and choose the Sent folder.
Configure POP3 protocol
- Launch the program and click Next in the welcome screen.
- In the Configure your account window, leave Yes as the default value and click Next.If you already have an Outlook account and want to add another, choose File → Details and click Add a new account.
- Select Manually configure the server parameters or additional server types and click Next.
- Leave the default value for Internet email and click Next.
- Specify the following account parameters:
- Name — user name (for example, “James Kirk”);
- Email address — your Yandex Email address (for example, “[email protected]”);
- Account type– POP3
- Incoming mail server — pop.yandex.com;
- Outgoing mail server (SMTP) — smtp.yandex.com;
- User — your Yandex username;
- Password – your Yandex password (or the application password if you enabled two-factor authentication).
Attention! If you are configuring the mail delivery from a mailbox like “[email protected]”, then specify only the first part of the address (before the @ sign) in the “User” field.Leave default values for all other parameters and click Other settings.
- Open the Outgoing mail server tab, enable the SMTP requires authentication checkbox, and select Same as the incoming mail server.
- Go to the Advanced tab and specify the following parameters :
- POP3 server — 995;
- SMTP server — 465.
Select the option The server requires an encrypted connection (SSL). For the Use the following type of encrypted connection option, select SSL.
If you want to keep copies of messages on the server, then also enable the option Leave copies of messages on the server.
Click OK.
- To finish account configuration, in the Add a new account window, click Next to validate the account settings you have specified. If all the settings are correct and confirmed, click Ready. If not, make sure that all the parameters are entered properly.
To change the account settings, choose File → Account settings (Microsoft Outlook 2010 and later) or Tools →Account settings (Microsoft Outlook 2007 and earlier), then select the account on the Email tab, and click Edit.
Mozilla Thunderbird
Mozilla Thunderbird
To receive mail via Mozilla Thunderbird, first enable POP3 or IMAP protocol in mailbox settings.
Configuring IMAP protocol
- Launch the program and click Ignore this and use my existing email in the welcome screen.
- Specify the following account parameters in the window Configure mail account:
- Your name– username (for example, “James Kirk”)
- Email address — your yandex email address (for example, “[email protected]”);
- Password – your Yandex password (or the application password if you enabled two-factor authentication).
Click Continue.
- Click on Manual setup and specify the following parameters for the mail servers:
- Incoming mail
-
- Protocol — IMAP;
- Server name — imap.yandex.com;
- Port — 993;
- SSL — SSL/TLS;
- Authentication – Normal password
- Outgoing mail
-
- Server name — smtp.yandex.com;
- Port — 465;
- SSL — SSL/TLS;
- Authentication – Normal password
Also type username: your username in Yandex, for example, “capt.kirk”.
Attention! If you configure receiving mail from a mailbox like “[email protected]”, then specify the part of the address before the @ sign in “Account” field. - Click Retest to verify the parameters that were entered are correct. If the test was successful, click Finish.
- Synchronize the newly created account with the server to obtain a list of folders.
- Right-click the account name and choose Parameters.
- Go to Server settings and in When deleting messages, select Move to deleted items folder.
- Go to the Copies and folders section and define the folders with the name of your Yandex mailbox.
- Click OK to apply the changes and restart the program.
Configure POP3 protocol
- Launch the program and click Ignore this and use my existing email in the welcome screen.
- Specify the following account parameters in the window Configure mail account:
- Your name– username (for example, “James Kirk”)
- Email address — your yandex email address (for example, “[email protected]”);
- Password – your Yandex password (or the application password if you enabled two-factor authentication).
Click Continue.
- Click on Manual setup and specify the following parameters for the mail servers:
- Incoming mail
-
- Protocol — POP3;
- Server name — pop.yandex.com;
- Port — 995;
- SSL — SSL/TLS;
- Authentication – Normal password
- Outgoing mail
-
- Server name — smtp.yandex.com;
- Port — 465;
- SSL — SSL/TLS;
- Authentication – Normal password
Also type username: your username in Yandex, for example, “capt.kirk”.
Attention! If you configure receiving mail from a mailbox like “[email protected]”, then specify the part of the address before the @ sign in “Account” field. - Click Retest to verify the parameters that were entered are correct. If the test was successful, click Finish.
- Right-click the account name and choose Parameters.
- Go to Server parameters and uncheck the option Leave copies of messages on the server.
- Click OK to apply the changes and restart the program.
The Bat
The Bat
To receive mail using The Bat!, first enable POP3 or IMAP protocol in mailbox settings.
Configuring IMAP protocol
- Launch the program.
- In the Install The Bat! window, click Next, leaving the default settings.
- In the First launch of The Bat! box, click OK, leaving the default settings.
- Select Create new mailbox and then click Next.
- Enter the name of the box, for example, “James Kirk”, and then click Next.
- Specify the following account parameters:
- Your full name – username, for example, “James Kirk”
- Email address – your Yandex email address (e.g., “[email protected]”)
Click Next.
- In Use protocol to access the server section select IMAP4—Internet Message Access Protocol v4 value. Make sure that received mail server address and SMTP server address are specified correctly:
- Server for receiving mail – imap.yandex.ru;
- SMTP server address – smtp.yandex.com;
Also check whether both of the following options are enabled Secure connection and My Server Requires SMTP Authentication. Click Next.
- Specify the following account parameters:
- User– your Yandex username, for example, “capt.kirk”;
- Password – your Yandex password (or the application password if you enabled two-factor authentication).
Attention! If you configure receiving mail from a mailbox like “[email protected]”, then specify the part of the address before the @ sign in “Account” field. If you use Yandex.Mail for domain, then specify the full mailbox address in this field.Uncheck Do not use trash when deleting and click Next.
- Specify Internet connection method: via LAN or manual connection and then click Next.
- Select Yes to verify the remaining properties of the mailbox and then click Finish.
- Go to the Transport section and specify the following parameters for the email servers:
- Sending mail
-
- SMTP-server — smtp.yandex.com;
- Port — 465;
- Connection — Secure connection via a dedicated port (TLS).
- Receiving mail
-
- Mail server – imap.yandex.com
- Port — 993;
- Connection — Secure connection via a dedicated port (TLS).
- Click Authentication to open SMTP server authentication parameters. Make sure that the SMTP Authentication and Use mail receipt parameters (POP3/IMAP) options are enabled.Click OK to apply the changes and restart the program.
- Synchronize the newly created account with the server to obtain a list of folders. To do this, right-click on the mailbox name and select Update folder tree.
- Right-click the mailbox name and select Mailbox properties. Go to the Email management section and inUsing IMAP folders as standard select value Sent for the Sent folder and then set value Deleted for theTrash folder. In the section Automatically connect to server set value The Bat! at boot up.
- Go to the Deletion subsection and specify the Deleted folder as the preference for normal and alternative deletion. Also disable the option Use alternative deletion for old messages and enable the optionAutomatically compress folders after emptying.
- Go to the Parameters section and enable Scan The Bat! at Startup and the option Compress all folders when exiting The Bat!.
- Click OK to apply the changes and restart the program.
Configure POP3 protocol
- Launch the program.
- In the Install The Bat! window, click Next, leaving the default settings.
- In the First launch of The Bat! box, click OK, leaving the default settings.
- Select Create new mailbox and then click Next.
- Enter the name of the box, for example, “James Kirk”, and then click Next.
- Specify the following account parameters:
- Your full name – username, for example, “James Kirk”
- Email address – your Yandex email address (e.g., “[email protected]”)
Click Next.
- Select Use POP3 protocol to access the server—Post Office Protocol v3. Make sure that received mail server address and SMTP server address are specified correctly:
- Received mail server – pop.yandex.com;
- SMTP server address – smtp.yandex.com;
Also check whether both of the following options are enabled Secure connection and My Server Requires SMTP Authentication. Click Next.
- Specify the following account parameters:
- User– your Yandex username, for example, “capt.kirk”;
- Password – your Yandex password (or the application password if you enabled two-factor authentication).
Attention! If you configure receiving mail from a mailbox like “[email protected]”, then specify the part of the address before the @ sign in “Account” field. If you use Yandex.Mail for domain, then specify the full mailbox address in this field.Enable option Leave messages on the server and click Next.
- Specify Internet connection method: via LAN or manual connection and then click Next.
- Select Yes to verify the remaining properties of the mailbox and then click Finish.
- Go to the Transport section and specify the following parameters for the email servers:
- Sending mail
-
- SMTP-server — smtp.yandex.com;
- Port — 465;
- Connection — Secure connection via a dedicated port (TLS).
- Receiving mail
-
- Mail server — pop.yandex.com;
- Port — 995;
- Connection — Secure connection via a dedicated port (TLS).
- Click Authentication to open SMTP server authentication parameters. Make sure that the SMTP Authentication and Use mail receipt parameters (POP3/IMAP) options are enabled.
- Click OK to apply the changes.
Apple Mail
Apple Mail
To receive the mail via Apple Mail, first enable POP3 or IMAP support in your mailbox settings.
Configuring IMAP protocol
- Run the program and open the Mail → Add account menu to launch the account creation wizard.
Note. Account creation wizard opens automatically when the program is launched for the first time.
- Select Add another mail account and then click Continue.
- In the Add Mail account window, specify the following account parameters:
- Full name – username (for example, “Commander Spock”);
- Email address — your Yandex email address (e.g. “[email protected]”);
- Password – your Yandex password (or the application password if you enabled two-factor authentication).
Click Create, and the program will verify the data.
Manual account setup - Open the menu Mail → Setup → Account properties. In the Outgoing mail server (SMTP) section, selectEdit list of SMTP servers.
- Go to the Options tab. Select the option Use Secure Sockets Layer (SSL), and in the Use specified portbox, enter 465.Click OK.
- Go to the Options tab. Enable the Use SSL option and enter the value 993 in the field.Also enable the option Include when automatically checking for new messages.
Configure POP3 protocol
- Run the program and open the Mail → Add account menu to launch the account creation wizard.
Note. Account creation wizard opens automatically when the program is launched for the first time.
- In the Add account window, specify the following account parameters:
- Full name – username (for example, “Commander Spock”);
- Email address — your Yandex email address (e.g. “[email protected]”);
- Password – your Yandex password (or the application password if you enabled two-factor authentication).
Click Create, and the program will verify the data.
- You can only configure an account for POP3 protocol manually. Click Next.
- In the Incoming mail server window, specify the following account parameters:
- Account type — POP;
- Incoming mail server — pop.yandex.com;
- Username – your Yandex username, for example,“ comm.spock”;
- Password – your Yandex password (or the application password if you enabled two-factor authentication).
Attention! If you configure receiving mail from a mailbox like “[email protected]”, then specify the part of the address before the @ sign in “Account” field.Click Next.
- (Optional) Enable the Use SSL option and enter value 995 in the Port field.Click Next.
- In the Incoming mail server window, specify the following account parameters:
- Description – the name of your mailbox in the program
- Outgoing (SMTP) email server — smtp.yandex.com;
- Username – your Yandex username, for example,“ comm.spock”;
- Password – your Yandex password
Click Create.
- Open the menu Mail → Setup → Account properties. In the Outgoing mail server (SMTP) section, selectEdit list of SMTP servers.
- Select the option Use Secure Sockets Layer (SSL), and in the Use specified port box, enter 465.Click OK.
- Go to the Options tab. Enable the Use SSL option and enter value 995 in the field.Also enable the Include automatically when checking for new messages option and uncheck Remove copy from server after reception of message.
Opera Mail
Opera Mail
To receive email using Opera Mail, first enable POP3 or IMAP protocol in your mailbox settings.
Configuring IMAP protocol
- Start the program, select the Mail item in the list of account types, and then click Next.
- Specify the following account parameters:
- Full name – user name (e.g., “James Kirk”)
- Email address – your Yandex email address (e.g. “[email protected]”).
Click Next.
- Specify the following account parameters:
- Username – your Yandex username, for example, “capt.kirk”;
- Password – your Yandex password (or the application password if you enabled two-factor authentication);
- Account type — IMAP.
Attention! If you configure receiving mail from a mailbox like “[email protected]”, then specify the part of the address before the @ sign in “Account” field.Click Finish.
- Synchronize the newly created account with the server to obtain a list of folders.
- Click
 in the mailbox name and select Properties.
 - Go to the IMAP tab and configure correspondence for the Sent, Trash, and Spam folders.
- Click OK to apply the changes and restart the program.
Configure POP3 protocol
- Start the program, select the Mail item in the list of account types, and then click Next.
- Specify the following account parameters:
- Full name – user name (e.g., “James Kirk”)
- Email address – your Yandex email address (e.g. “[email protected]”).
Click Next.
- Specify the following account parameters:
- Username – your Yandex username, for example, “capt.kirk”;
- Password – your Yandex password (or the application password if you enabled two-factor authentication);
- Account type — POP.
Attention! If you configure receiving mail from a mailbox like “[email protected]”, then specify the part of the address before the @ sign in “Account” field.Click Finish.